Today I have configured NX server.
Now, Next task is to create users and really its very time consuming and boring task.
Usually you use useradd command to create a new user or update default new user information from command line.
So i have explore Linux and searched on Google , I have found few scripts to do this. But later I have found one good and easy solution.
Here is that,
Update and create new users in bulk.
newusers command reads a file of user name and clear-text password pairs and uses this information to update a group of existing users or to create new users. Each line is in the same format as the standard password file.
This command is intended to be used in a large system environment where many accounts are updated at a single time (batch mode). Since username and passwords are stored in clear text format make sure only root can read/write the file. Use chmod command:
# touch /root/bulk-user-add.txt
# chmod 0600 /root/bulk-user-add.txt
Create a user list as follows. Open file:
# emacs /root/bulk-user-add.txt
Append username and password:
sanjay:mypass99:555:555:Sanjay Singh:/home/Sanjay:/bin/bash
frampton:mypass99n:556:556:Frampton Martin:/home/Frampton:/bin/bash
----
--
---
barun:mypass99:560:560:Barun Ghosh:/home/Barun:/bin/bash
Now create users in batch:
# newusers /root/bulk-user-add.txt
Read man page of newusers for more information.
May be I will automate entire procedure using a php
Monday, March 30, 2009
Tuesday, March 24, 2009
Boot time parameters of Linux kernel
Boot time parameters you should know about the Linux kernel.
The Linux kernel accepts boot time parameters as it starts to boot system. This is used to inform kernel about various hardware parameter.
The kernel command line syntax
name=value1,value2,value3…
Where,
* name : Keyword name, for example, init, ro, boot etc
Common Boot time parameters
init
This sets the initial command to be executed by the kernel. Default is to use /sbin/init, which is the parent of all processes.
To boot system without password pass /bin/bash or /bin/sh as argument to init
init=/bin/bash
single
The most common argument that is passed to the init process is the word 'single' which instructs init to boot the computer in single user mode, and not launch all the usual daemons
root=/dev/device
This argument tells the kernel what device (hard disk, floppy disk) to be used as the root filesystem while booting. For example following boot parameter use /dev/sda1 as the root file system:
root=/dev/sda1
If you copy entire partition from /dev/sda1 to /dev/sdb1 then use
root=/dev/sdb1
ro
This argument tells the kernel to mount root file system as read-only. This is done so that fsck program can check and repair a Linux file system. Please note that you should never ever run fsck on read/write file system.
rw
This argument tells the kernel to mount root file system as read and write mode.
panic=SECOND
Specify kernel behavior on panic. By default, the kernel will not reboot after a panic, but this option will cause a kernel reboot after N seconds. For example following boot parameter will force to reboot Linux after 10 seconds
panic=10
maxcpus=NUMBER
Specify maximum number of processors that an SMP kernel should make use of. For example if you have four cpus and would like to use 2 CPU then pass 2 as a number to maxcpus (useful to test different software performances and configurations).
maxcpus=2
debug
Enable kernel debugging. This option is useful for kernel hackers and developers who wish to troubleshoot problem
selinux [0|1]
Disable or enable SELinux at boot time.
• Value 0 : Disable selinux
• Value 1 : Enable selinux
raid=/dev/mdN
This argument tells kernel howto assembly of RAID arrays at boot time. Please note that When md is compiled into the kernel (not as module), partitions of type 0xfd are scanned and automatically assembled into RAID arrays. This autodetection may be suppressed with the kernel parameter "raid=noautodetect". As of kernel 2.6.9, only drives with a type 0 superblock can be autodetected and run at boot time.
mem=MEMEORY_SIZE
This is a classic parameter. Force usage of a specific amount of memory to be used when the kernel is not able to see the whole system memory or for test. For example:
mem=1024M
The kernel command line is a null-terminated string currently up to 255 characters long, plus the final null. A string that is too long will be automatically truncated by the kernel, a boot loader may allow a longer command line to be passed to permit future kernels to extend this limit (H. Peter Anvin ).
Other parameters
initrd /boot/initrd.img
An initrd should be loaded. the boot process will load the kernel and an initial ramdisk; then the kernel converts initrd into a "normal" ramdisk, which is mounted read-write as root device; then /linuxrc is executed; afterwards the "real" root file system is mounted, and the initrd file system is moved over to /initrd; finally the usual boot sequence (e.g. invocation of /sbin/init) is performed. initrd is used to provide/load additional modules (device driver). For example, SCSI or RAID device driver loaded using initrd.
hdX =noprobe
Do not probe for hdX drive. For example, disable hdb hard disk:
hdb=noprobe
If you disable hdb in BIOS, Linux will still detect it. This is the only way to disable hdb.
ether=irq,iobase,[ARG1,ARG2],name
Where,
• ether: ETHERNET DEVICES
For example, following boot argument force probing for a second Ethernet card (NIC), as the default is to only probe for one (irq=0,iobase=0 means automatically detect them).
ether=0,0,eth1
How to begin the enter parameters mode?
You need to enter all this parameter at Grub or Lilo boot prompt. For example if you are using Grub as a boot loader, at Grub prompt press 'e' to edit command before booting.
1) Select second line
2) Again, press 'e' to edit selected command
3) Type any of above parameters.
See an example of "recovering grub boot loader password", for more information. Another option is to type above parameters in grub.conf or lilo.conf file itself.
More detail
Sunday, March 22, 2009
MYSQL REPLICATION & DISASTER RECOVERY
MySQL’s built-in replication capability is the foundation for building large, high performance applications on top of MySQL. Replication lets you configure one or more servers as slaves, or replicas, of another server.
1. Setting up Replication:

Three threads are involved in Replication: One on the master and two on the slave.
• The I/O thread on the slave connects to the master and requests the binary update log. The Binary log dump thread on the master sends the binary update log to the slave on request.
• Once on the slave, the I/O thread reads the data sent by the master and copies it to the relay log in the data directory.
• The third thread, also on the slave, is the SQL Thread, which read and executes the queries from the relay log to bring the slave in alignment with the master.
2. Replication with example:
Version: Both master and slave should be the same version. Otherwise replication will be improper.
Network Configuration Settings
Master Server IP Address: 10.5.1.10
Slave Server Primary IP Address (Ethernet eth0): 10.5.1.11
Slave Server Secondary IP Address (Ethernet eth1): 10.5.1.10 (By default it is disabled)
3. MySQL Replication Installation:
Step1:
Install MySQL on master 1 and slave 1. Configure network services on both systems, like
Master 1/Slave 2 IP: 10.5.1.10
Master 2/Slave 1 IP: 10.5.1.11
Step2:
On Master 1, make changes in my.cnf:
[mysqld]
logbin= mysqlbin
binlogdodb= # input the database which should be replicated or ignore this command to replicate all the databases.
binlogignoredb= mysql # input the database that should be ignored for replication
serverid=1
auto_increment_increment=2
auto_increment_offset=1
Step 3:
On master 1, create a replication slave account in mysql.
mysql> grant replication slave on *.* to 'replication'@10.5.1.11 identified by 'slave';
Restart the mysql master1.
Step 4:
Now edit my.cnf on Slave1 or Master2:
[mysqld]
serverid =2
masterhost= 10.5.1.10
masteruser= replication
masterpassword= slave
masterport= 3306
Step 5:
Restart th MySQL Slave 1.
Login to the MySQL command prompt and start the slave replication.
[root@Slavetest ~]# mysql -u root -p
Enter password: xxxxx (Please consult MySQL Administrator/IT Manager)
Welcome to the MySQL monitor. Commands end with; or \g.
Your MySQL connection id is 250
Server version: 5.0.54a-enterprise-gpl-log MySQL Enterprise Server (GPL)
Type 'help;' or '\h' for help. Type '\c' to clear the buffer.
mysql>
mysql> start slave;
mysql> show slave status\G;
*************************** 1. row ***************************
Slave_IO_State: Waiting for master to send event
Master_Host: 10.5.1.10
Master_User: replication
Master_Port: 3306
Connect_Retry: 60
Master_Log_File: mysql-bin.000018
Read_Master_Log_Pos: 2953
Relay_Log_File: slavetest-relay-bin.000065
Relay_Log_Pos: 235
Relay_Master_Log_File: mysql-bin.000018
Slave_IO_Running: Yes
Slave_SQL_Running: Yes
Replicate_Do_DB:
Replicate_Ignore_DB:
Replicate_Do_Table:
Replicate_Ignore_Table:
Replicate_Wild_Do_Table:
Replicate_Wild_Ignore_Table:
Last_Errno: 0
Last_Error:
Skip_Counter: 0
Exec_Master_Log_Pos: 2953
Relay_Log_Space: 235
Until_Condition: None
Until_Log_File:
Until_Log_Pos: 0
Master_SSL_Allowed: No
Master_SSL_CA_File:
Master_SSL_CA_Path:
Master_SSL_Cert:
Master_SSL_Cipher:
Master_SSL_Key:
Seconds_Behind_Master: 0
1 row in set (0.00 sec)
mysql>
Above highlighted rows must be indicate related log files and Slave_IO_Running and
Slave_SQL_Running: must be to YES.
Step 6:
On Master 1:
[root@TESTDB~]# mysql -u root -p
Enter password: xxxxx (Please consult MySQL Administrator/IT Manager)
Welcome to the MySQL monitor. Commands end with; or \g.
Your MySQL connection id is 250
Server version: 5.0.54a-enterprise-gpl-log MySQL Enterprise Server (GPL)
Type 'help;' or '\h' for help. Type '\c' to clear the buffer.
mysql>
mysql> show master status;
+------------------------------------+-----------+--------------------+------------------------+
| File | Position | Binlog_Do_DB | Binlog_Ignore_DB|
+------------------------------------+-----------+--------------------+------------------------+
|MysqlMYSQL01-bin.000008| 410 | | mysql |
+------------------------------------+-----------+--------------------+------------------------+
1 row in set (0.00 sec)
The above scenario is for master-slave, now we will create a slave master scenario for the same systems and it will work as master master.
Step 7:
Edit on Master 2/ Slave 1, edit my.cnf and master entries into it:
[mysqld]
logbin=mysqlbin #information for becoming master added
binlogignoredb=mysql
Step 8:
Create a replication slave account on master2 for master1:
mysql> grant replication slave on *.* to 'slavereplication'@10.5.1.10 identified by 'slave';
Step 9:
Edit my.cnf on master1 for information of its master.
[mysqld]
auto_increment_increment=2
auto_increment_offset=1 #information for becoming slave.
masterhost= 10.5.1.11
masteruser= slavereplication
masterpassword= slave
masterport= 3306
master_connect_retry=60
Step 10:
Restart both mysql master1 and master2.
Step 11:
Monitor Mysql Replication using :
• show slave status\G
• show processlist\G
• show master status;
4. Fail over Configuration Procedure :
Step1:
Login to Slave Server Using Secure Shell in Linux or Putty tool
[root@TESTDB ~]# ssh 10.5.1.11
root@10.5.1.11 password: xxxxx
Last login: Tue Oct 7 15:30:41 2008 from 10.5.1.10
[root@slavetest ~]#
or Use Putty Tool in Windows
Enter the slave IP address and user name and password
After login into slave machine proceed the below steps.
Step2:
Connect the Ethernet Interface cable.
Step3:
Enable the secondary Ethernet interface
[root@slavetest ~]# ifup eth1
Step4: Login into Mysql
[root@slavetest ~]# mysql -u root -p
Enter password: xxxxx (Please consult MySQL Administrator/IT Manager)
Welcome to the MySQL monitor. Commands end with ; or \g.
Your MySQL connection id is 250
Server version: 5.0.54a-enterprise-gpl-log MySQL Enterprise Server (GPL)
Type 'help;' or '\h' for help. Type '\c' to clear the buffer.
mysql>
You Will get Welcome message and mysql prompt as show above.
Step5:
Check the Slave Status
mysql> show slave status\G
*************************** 1. row ***************************
Slave_IO_State: Waiting for master to send event
Master_Host: 10.5.1.10
Master_User: replication
Master_Port: 3306
Connect_Retry: 60
Master_Log_File: mysql-bin.000018
Read_Master_Log_Pos: 2953
Relay_Log_File: slavetest-relay-bin.000065
Relay_Log_Pos: 235
Relay_Master_Log_File: mysql-bin.000018
Slave_IO_Running: Yes
Slave_SQL_Running: Yes
Replicate_Do_DB:
Replicate_Ignore_DB:
Replicate_Do_Table:
Replicate_Ignore_Table:
Replicate_Wild_Do_Table:
Replicate_Wild_Ignore_Table:
Last_Errno: 0
Last_Error:
Skip_Counter: 0
Exec_Master_Log_Pos: 2953
Relay_Log_Space: 235
Until_Condition: None
Until_Log_File:
Until_Log_Pos: 0
Master_SSL_Allowed: No
Master_SSL_CA_File:
Master_SSL_CA_Path:
Master_SSL_Cert:
Master_SSL_Cipher:
Master_SSL_Key:
Seconds_Behind_Master: 0
1 row in set (0.00 sec)
mysql>
Above Result will display Slave Replication status.
Make sure that the slave has processed any statements in their relay log. On slave, issue STOP SLAVE IO_THREAD, then check the output of SHOW PROCESSLIST until you see Has read all relay log; waiting for the slave I/O thread to update it. When this is true for all slaves, they can be reconfigured to the new setup.
mysql> Stop Slave io_thread;
mysql> show processlist\G
*************************** 1. row ***************************
Id : 203
User: slavereplication
Host: 10.5.1.10:59795
db : NULL
Command: Binlog Dump
Time: 158086
State: Has sent all binlog to slave; waiting for binlog to be updated
Info: NULL
*************************** 2. row ***************************
Id: 230
User: system user
Host:
db: NULL
Command: Connect
Time: 152220
State: Has read all relay log; waiting for the slave I/O thread to update it
Info: NULL
*************************** 3. row ***************************
Id: 251
User: root
Host: localhost
db: NULL
Command: Query
Time: 0
State: NULL
Info: show processlist
3 rows in set (0.00 sec)
mysql>
Step6:
Making Slave as Master server
mysql> show master status;
+----------------------+----------+-------------------+-----------------------------+
| File | Position | Binlog_Do_DB | Binlog_Ignore_DB |
+----------------------+----------+-------------------+-----------------------------+
| mysql-bin.000006 | 783 | | mysql,mysql |
+----------------------+----------+-------------------+-----------------------------+
1 row in set (0.00 sec)
mysql>
(Note : This is very important make a note down of mysql log file and position when the slave becomes master).
mysql> stop slave;
This command will stop the slave replication. Now it is ready to serve as a master, start the application in the server.
5. Restoration Procedure:
Note: Bring down the secondary Ethernet interface eth1 down in slave server before your plan to restore. Now once the original master server problem has been fixed and making it as live server. When Master is up again, you must issue the CHANGE MASTER, so that Master becomes a slave of S1 and picks up each Web Client writes that it missed while it was down.
Step1:
Connect to the Current Master server
[root@TESTDB ~]# ssh 10.5.1.11
root@10.5.1.11's password: xxxxxxx
Last login: Tue Oct 7 15:30:41 2008 from 10.5.1.10
[root@mastertest ~]#
or
Use Putty Tool in Windows
Enter the slave IP address and user name and password
After login into machine proceed the below steps.
Step 2:
Unplug the secondary Ethernet Interface in current Master.
Step3:
Disable the secondary Ethernet Interface in current Master.
[root@mastertest ~]# ifdown eth1
Now Boot the Original Master Server and if the Ethernet cable is UN-plugged. Plug the Ethernet Interface in the Original Master server.
Step4:
Login To Original_Mater Server Using Secure Shell in Linux or Putty tool
[root@TESTDB ~]# ssh 10.5.1.10
root@10.5.1.10's password: xxxxxxx
Last login: Tue Oct 7 15:30:41 2008 from 10.5.1.10
[root@mastertest ~]#
Or Use Putty Tool in Windows
Enter the slave IP address and user name and password
After login into machine proceed the below steps.
Step5:
Login into Mysql
[root@slavetest ~]# mysql -u root -p
Enter password: xxxxx (Please consult MySQL Administrator/IT Manager)
Welcome to the MySQL monitor. Commands end with ; or \g.
Your MySQL connection id is 250
Server version: 5.0.54a-enterprise-gpl-log MySQL Enterprise Server (GPL)
Type 'help;' or '\h' for help. Type '\c' to clear the buffer.
mysql>
You Will get Welcome message and mysql prompt as show above.
Step6:
Configure Old_master as a Slave Server of Current_Master Server
mysql>change master to
>master_host=10.5.1.11', (slave server ip address)
>master_user='slavereplication', (slavereplication-mysql replication user created in the
slave server)
>master_password='slave', (slave- mysql replication user password created in the
slave server)
>master_log_file='mysql-bin.0000xx', (xx: position of current_master server log file name as shown in show master status, at the time of
making slave as master)
> master_log_pos=xx; (xx:position of current_master log position as shown
in show master status, at the time of making slave as master)
mysql>
mysql>start slave;
Now it will get updates, which are missed during the failure. Once all update has been finished make master a master again.
Step7:
To make Master a master again (because it is the most powerful machine, for example), use the preceding procedure as if Slave 1 was unavailable and Master was to be the new master.
[root@mastertest ~]# service mysql stop
[root@mastertest ~]# cd /var/lib/mysql
[root@mastertest ~]# mv master.info relay-log.info servername-relay.bin* /root
[root@mastertest ~]# service mysql start
Step8:
Making original Slave as a slave replication server
[root@slavetest ~]# mysql -u root -p
Enter password: xxxxx (Please consult MySQL Administrator/IT Manager)
Welcome to the MySQL monitor. Commands end with ; or \g.
Your MySQL connection id is 250
Server version: 5.0.54a-enterprise-gpl-log MySQL Enterprise Server (GPL)
Type 'help;' or '\h' for help. Type '\c' to clear the buffer.
mysql> start slave;
6. Replication Files:
Let’s take a look at some of the files replication uses. You already know about the binary log and the relay log, but there are several other files too. Where MySQL places them depends mostly on your configuration settings. Different MySQL versions place them in different directories by default. You can probably find them either in the data directory or in the directory that contains the server’s .pid file (possibly /var/run/mysqld/ on Unix-like systems).
Here they are:
• mysql-bin.index : A server that has binary logging enabled will also have a file named the same as the binary logs, but with a .index suffix. This file keeps track of the binary log files that exist on disk. It is not an index in the sense of a table’s index; rather, each line in the file contains the filename of a binary log file. You might be tempted to think that this file is redundant and can be deleted (after all, MySQL could just look at the disk to find its files), but don’t. MySQL relies on this index file, and it will not recognize a binary log file unless it’s mentioned here.
• mysql-relay-bin.index : This file serves the same purpose for the relay logs as the binary log index file does for the binary logs.
• master.info : This file contains the information a slave server needs to connect to its master. Don’t delete it, or your slave will not know how to connect to its master after it restarts. This file contains the replication user’s password, in plain text, so you may want to restrict its permissions.
• relay-log.info: This file contains the slave’s current binary log and relay log coordinates (i.e., the slave’s position on the master). Don’t delete this either, or the slave will forget where it was replicating from after a restart and might try to replay statements it has already executed.
These files are a rather crude way of recording MySQL’s replication and logging state. Unfortunately, they are not written synchronously, so if your server loses power and the files haven’t yet been flushed to disk, they can be inaccurate when the server restarts.
1. Setting up Replication:

Three threads are involved in Replication: One on the master and two on the slave.
• The I/O thread on the slave connects to the master and requests the binary update log. The Binary log dump thread on the master sends the binary update log to the slave on request.
• Once on the slave, the I/O thread reads the data sent by the master and copies it to the relay log in the data directory.
• The third thread, also on the slave, is the SQL Thread, which read and executes the queries from the relay log to bring the slave in alignment with the master.
2. Replication with example:
Version: Both master and slave should be the same version. Otherwise replication will be improper.
Network Configuration Settings
Master Server IP Address: 10.5.1.10
Slave Server Primary IP Address (Ethernet eth0): 10.5.1.11
Slave Server Secondary IP Address (Ethernet eth1): 10.5.1.10 (By default it is disabled)
3. MySQL Replication Installation:
Step1:
Install MySQL on master 1 and slave 1. Configure network services on both systems, like
Master 1/Slave 2 IP: 10.5.1.10
Master 2/Slave 1 IP: 10.5.1.11
Step2:
On Master 1, make changes in my.cnf:
[mysqld]
logbin= mysqlbin
binlogdodb=
binlogignoredb= mysql # input the database that should be ignored for replication
serverid=1
auto_increment_increment=2
auto_increment_offset=1
Step 3:
On master 1, create a replication slave account in mysql.
mysql> grant replication slave on *.* to 'replication'@10.5.1.11 identified by 'slave';
Restart the mysql master1.
Step 4:
Now edit my.cnf on Slave1 or Master2:
[mysqld]
serverid =2
masterhost= 10.5.1.10
masteruser= replication
masterpassword= slave
masterport= 3306
Step 5:
Restart th MySQL Slave 1.
Login to the MySQL command prompt and start the slave replication.
[root@Slavetest ~]# mysql -u root -p
Enter password: xxxxx (Please consult MySQL Administrator/IT Manager)
Welcome to the MySQL monitor. Commands end with; or \g.
Your MySQL connection id is 250
Server version: 5.0.54a-enterprise-gpl-log MySQL Enterprise Server (GPL)
Type 'help;' or '\h' for help. Type '\c' to clear the buffer.
mysql>
mysql> start slave;
mysql> show slave status\G;
*************************** 1. row ***************************
Slave_IO_State: Waiting for master to send event
Master_Host: 10.5.1.10
Master_User: replication
Master_Port: 3306
Connect_Retry: 60
Master_Log_File: mysql-bin.000018
Read_Master_Log_Pos: 2953
Relay_Log_File: slavetest-relay-bin.000065
Relay_Log_Pos: 235
Relay_Master_Log_File: mysql-bin.000018
Slave_IO_Running: Yes
Slave_SQL_Running: Yes
Replicate_Do_DB:
Replicate_Ignore_DB:
Replicate_Do_Table:
Replicate_Ignore_Table:
Replicate_Wild_Do_Table:
Replicate_Wild_Ignore_Table:
Last_Errno: 0
Last_Error:
Skip_Counter: 0
Exec_Master_Log_Pos: 2953
Relay_Log_Space: 235
Until_Condition: None
Until_Log_File:
Until_Log_Pos: 0
Master_SSL_Allowed: No
Master_SSL_CA_File:
Master_SSL_CA_Path:
Master_SSL_Cert:
Master_SSL_Cipher:
Master_SSL_Key:
Seconds_Behind_Master: 0
1 row in set (0.00 sec)
mysql>
Above highlighted rows must be indicate related log files and Slave_IO_Running and
Slave_SQL_Running: must be to YES.
Step 6:
On Master 1:
[root@TESTDB~]# mysql -u root -p
Enter password: xxxxx (Please consult MySQL Administrator/IT Manager)
Welcome to the MySQL monitor. Commands end with; or \g.
Your MySQL connection id is 250
Server version: 5.0.54a-enterprise-gpl-log MySQL Enterprise Server (GPL)
Type 'help;' or '\h' for help. Type '\c' to clear the buffer.
mysql>
mysql> show master status;
+------------------------------------+-----------+--------------------+------------------------+
| File | Position | Binlog_Do_DB | Binlog_Ignore_DB|
+------------------------------------+-----------+--------------------+------------------------+
|MysqlMYSQL01-bin.000008| 410 | | mysql |
+------------------------------------+-----------+--------------------+------------------------+
1 row in set (0.00 sec)
The above scenario is for master-slave, now we will create a slave master scenario for the same systems and it will work as master master.
Step 7:
Edit on Master 2/ Slave 1, edit my.cnf and master entries into it:
[mysqld]
logbin=mysqlbin #information for becoming master added
binlogignoredb=mysql
Step 8:
Create a replication slave account on master2 for master1:
mysql> grant replication slave on *.* to 'slavereplication'@10.5.1.10 identified by 'slave';
Step 9:
Edit my.cnf on master1 for information of its master.
[mysqld]
auto_increment_increment=2
auto_increment_offset=1 #information for becoming slave.
masterhost= 10.5.1.11
masteruser= slavereplication
masterpassword= slave
masterport= 3306
master_connect_retry=60
Step 10:
Restart both mysql master1 and master2.
Step 11:
Monitor Mysql Replication using :
• show slave status\G
• show processlist\G
• show master status;
4. Fail over Configuration Procedure :
Step1:
Login to Slave Server Using Secure Shell in Linux or Putty tool
[root@TESTDB ~]# ssh 10.5.1.11
root@10.5.1.11 password: xxxxx
Last login: Tue Oct 7 15:30:41 2008 from 10.5.1.10
[root@slavetest ~]#
or Use Putty Tool in Windows
Enter the slave IP address and user name and password
After login into slave machine proceed the below steps.
Step2:
Connect the Ethernet Interface cable.
Step3:
Enable the secondary Ethernet interface
[root@slavetest ~]# ifup eth1
Step4: Login into Mysql
[root@slavetest ~]# mysql -u root -p
Enter password: xxxxx (Please consult MySQL Administrator/IT Manager)
Welcome to the MySQL monitor. Commands end with ; or \g.
Your MySQL connection id is 250
Server version: 5.0.54a-enterprise-gpl-log MySQL Enterprise Server (GPL)
Type 'help;' or '\h' for help. Type '\c' to clear the buffer.
mysql>
You Will get Welcome message and mysql prompt as show above.
Step5:
Check the Slave Status
mysql> show slave status\G
*************************** 1. row ***************************
Slave_IO_State: Waiting for master to send event
Master_Host: 10.5.1.10
Master_User: replication
Master_Port: 3306
Connect_Retry: 60
Master_Log_File: mysql-bin.000018
Read_Master_Log_Pos: 2953
Relay_Log_File: slavetest-relay-bin.000065
Relay_Log_Pos: 235
Relay_Master_Log_File: mysql-bin.000018
Slave_IO_Running: Yes
Slave_SQL_Running: Yes
Replicate_Do_DB:
Replicate_Ignore_DB:
Replicate_Do_Table:
Replicate_Ignore_Table:
Replicate_Wild_Do_Table:
Replicate_Wild_Ignore_Table:
Last_Errno: 0
Last_Error:
Skip_Counter: 0
Exec_Master_Log_Pos: 2953
Relay_Log_Space: 235
Until_Condition: None
Until_Log_File:
Until_Log_Pos: 0
Master_SSL_Allowed: No
Master_SSL_CA_File:
Master_SSL_CA_Path:
Master_SSL_Cert:
Master_SSL_Cipher:
Master_SSL_Key:
Seconds_Behind_Master: 0
1 row in set (0.00 sec)
mysql>
Above Result will display Slave Replication status.
Make sure that the slave has processed any statements in their relay log. On slave, issue STOP SLAVE IO_THREAD, then check the output of SHOW PROCESSLIST until you see Has read all relay log; waiting for the slave I/O thread to update it. When this is true for all slaves, they can be reconfigured to the new setup.
mysql> Stop Slave io_thread;
mysql> show processlist\G
*************************** 1. row ***************************
Id : 203
User: slavereplication
Host: 10.5.1.10:59795
db : NULL
Command: Binlog Dump
Time: 158086
State: Has sent all binlog to slave; waiting for binlog to be updated
Info: NULL
*************************** 2. row ***************************
Id: 230
User: system user
Host:
db: NULL
Command: Connect
Time: 152220
State: Has read all relay log; waiting for the slave I/O thread to update it
Info: NULL
*************************** 3. row ***************************
Id: 251
User: root
Host: localhost
db: NULL
Command: Query
Time: 0
State: NULL
Info: show processlist
3 rows in set (0.00 sec)
mysql>
Step6:
Making Slave as Master server
mysql> show master status;
+----------------------+----------+-------------------+-----------------------------+
| File | Position | Binlog_Do_DB | Binlog_Ignore_DB |
+----------------------+----------+-------------------+-----------------------------+
| mysql-bin.000006 | 783 | | mysql,mysql |
+----------------------+----------+-------------------+-----------------------------+
1 row in set (0.00 sec)
mysql>
(Note : This is very important make a note down of mysql log file and position when the slave becomes master).
mysql> stop slave;
This command will stop the slave replication. Now it is ready to serve as a master, start the application in the server.
5. Restoration Procedure:
Note: Bring down the secondary Ethernet interface eth1 down in slave server before your plan to restore. Now once the original master server problem has been fixed and making it as live server. When Master is up again, you must issue the CHANGE MASTER, so that Master becomes a slave of S1 and picks up each Web Client writes that it missed while it was down.
Step1:
Connect to the Current Master server
[root@TESTDB ~]# ssh 10.5.1.11
root@10.5.1.11's password: xxxxxxx
Last login: Tue Oct 7 15:30:41 2008 from 10.5.1.10
[root@mastertest ~]#
or
Use Putty Tool in Windows
Enter the slave IP address and user name and password
After login into machine proceed the below steps.
Step 2:
Unplug the secondary Ethernet Interface in current Master.
Step3:
Disable the secondary Ethernet Interface in current Master.
[root@mastertest ~]# ifdown eth1
Now Boot the Original Master Server and if the Ethernet cable is UN-plugged. Plug the Ethernet Interface in the Original Master server.
Step4:
Login To Original_Mater Server Using Secure Shell in Linux or Putty tool
[root@TESTDB ~]# ssh 10.5.1.10
root@10.5.1.10's password: xxxxxxx
Last login: Tue Oct 7 15:30:41 2008 from 10.5.1.10
[root@mastertest ~]#
Or Use Putty Tool in Windows
Enter the slave IP address and user name and password
After login into machine proceed the below steps.
Step5:
Login into Mysql
[root@slavetest ~]# mysql -u root -p
Enter password: xxxxx (Please consult MySQL Administrator/IT Manager)
Welcome to the MySQL monitor. Commands end with ; or \g.
Your MySQL connection id is 250
Server version: 5.0.54a-enterprise-gpl-log MySQL Enterprise Server (GPL)
Type 'help;' or '\h' for help. Type '\c' to clear the buffer.
mysql>
You Will get Welcome message and mysql prompt as show above.
Step6:
Configure Old_master as a Slave Server of Current_Master Server
mysql>change master to
>master_host=10.5.1.11', (slave server ip address)
>master_user='slavereplication', (slavereplication-mysql replication user created in the
slave server)
>master_password='slave', (slave- mysql replication user password created in the
slave server)
>master_log_file='mysql-bin.0000xx', (xx: position of current_master server log file name as shown in show master status, at the time of
making slave as master)
> master_log_pos=xx; (xx:position of current_master log position as shown
in show master status, at the time of making slave as master)
mysql>
mysql>start slave;
Now it will get updates, which are missed during the failure. Once all update has been finished make master a master again.
Step7:
To make Master a master again (because it is the most powerful machine, for example), use the preceding procedure as if Slave 1 was unavailable and Master was to be the new master.
[root@mastertest ~]# service mysql stop
[root@mastertest ~]# cd /var/lib/mysql
[root@mastertest ~]# mv master.info relay-log.info servername-relay.bin* /root
[root@mastertest ~]# service mysql start
Step8:
Making original Slave as a slave replication server
[root@slavetest ~]# mysql -u root -p
Enter password: xxxxx (Please consult MySQL Administrator/IT Manager)
Welcome to the MySQL monitor. Commands end with ; or \g.
Your MySQL connection id is 250
Server version: 5.0.54a-enterprise-gpl-log MySQL Enterprise Server (GPL)
Type 'help;' or '\h' for help. Type '\c' to clear the buffer.
mysql> start slave;
6. Replication Files:
Let’s take a look at some of the files replication uses. You already know about the binary log and the relay log, but there are several other files too. Where MySQL places them depends mostly on your configuration settings. Different MySQL versions place them in different directories by default. You can probably find them either in the data directory or in the directory that contains the server’s .pid file (possibly /var/run/mysqld/ on Unix-like systems).
Here they are:
• mysql-bin.index : A server that has binary logging enabled will also have a file named the same as the binary logs, but with a .index suffix. This file keeps track of the binary log files that exist on disk. It is not an index in the sense of a table’s index; rather, each line in the file contains the filename of a binary log file. You might be tempted to think that this file is redundant and can be deleted (after all, MySQL could just look at the disk to find its files), but don’t. MySQL relies on this index file, and it will not recognize a binary log file unless it’s mentioned here.
• mysql-relay-bin.index : This file serves the same purpose for the relay logs as the binary log index file does for the binary logs.
• master.info : This file contains the information a slave server needs to connect to its master. Don’t delete it, or your slave will not know how to connect to its master after it restarts. This file contains the replication user’s password, in plain text, so you may want to restrict its permissions.
• relay-log.info: This file contains the slave’s current binary log and relay log coordinates (i.e., the slave’s position on the master). Don’t delete this either, or the slave will forget where it was replicating from after a restart and might try to replay statements it has already executed.
These files are a rather crude way of recording MySQL’s replication and logging state. Unfortunately, they are not written synchronously, so if your server loses power and the files haven’t yet been flushed to disk, they can be inaccurate when the server restarts.
Subscribe to:
Posts (Atom)
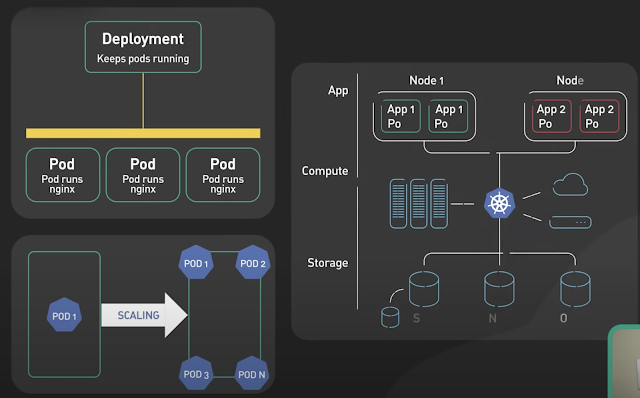
Basics of Kubernetes
Kubernetes, often abbreviated as K8s , is an open-source platform designed to automate the deployment, scaling, and management of container...
-
The Unix top command is designed to help users determine which processes are running and which applications are using more memory or process...
-
If you accidentally created a file with a - in the beginning then you want to remove it, you have to do : rm ./-thefile
-
 Kubernetes, often abbreviated as K8s , is an open-source platform designed to automate the deployment, scaling, and management of container...